
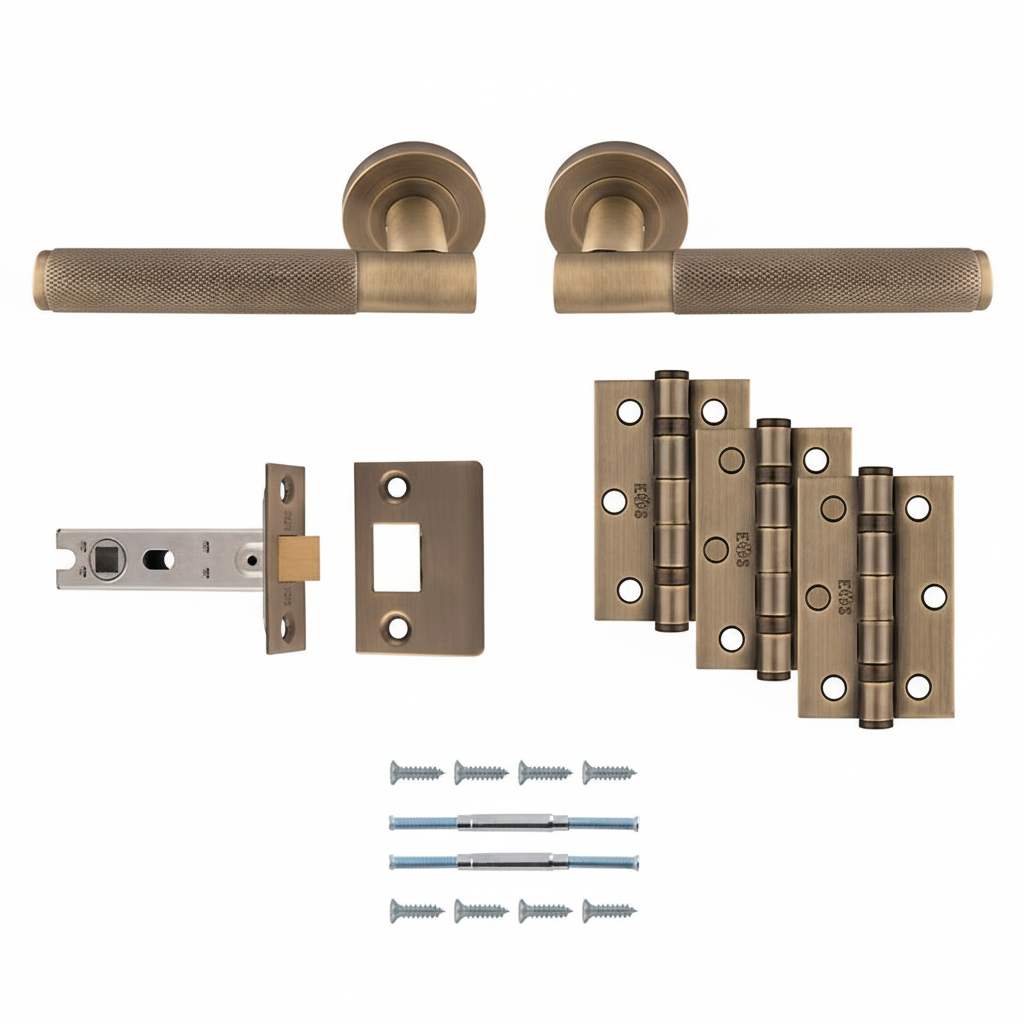
A well-coordinated door set looks deliberate: the handle, hinges, latch faceplate and strike plate appear to belong together, while every component remains suitable for the door. The important point is that coordination is not simply a matter of choosing three products labelled “brass” or “black”. Finish, dimensions, function, door weight and fire-rating requirements all have to agree.
Start with function and compatibility, then coordinate the visible finishes. Doing it in the opposite order can leave you with attractive hardware that does not fit the existing cut-outs, operate the latch correctly or meet the door’s performance requirements.
The correct order for choosing a coordinated door set
- Identify the door and its requirements: internal or external, new or existing, standard or fire-rated, and whether it is unusually heavy or wide.
- Choose the handle type: lever on rose, lever on backplate, door knob, bathroom handle or lock handle.
- Select the correct latch or lock: its case depth, backset and function must suit the handle and door.
- Confirm the hinge specification: size, load capacity, quantity, projection and any certification required.
- Coordinate the visible finishes: handle, roses or backplates, hinge knuckles, latch faceplate, strike plate and visible fixings.
This order prevents the finish from dictating a technically unsuitable product.
Decide what actually needs to match
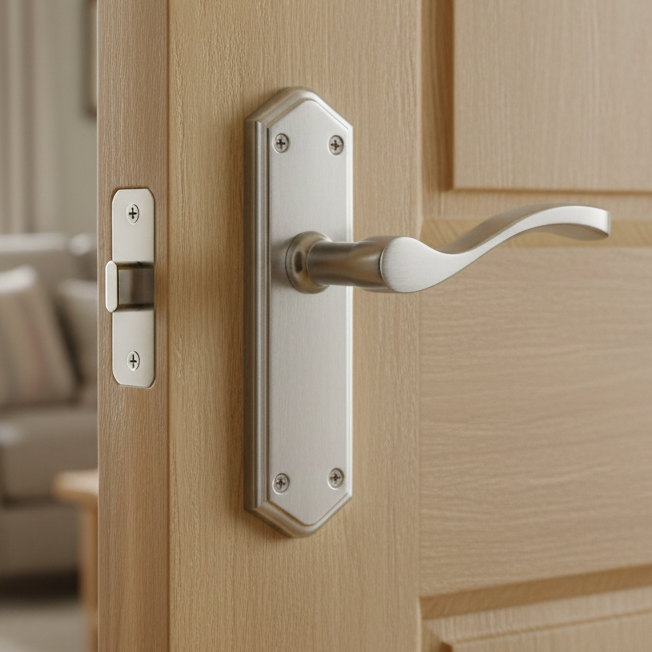
When the door is closed, the handle is normally the dominant feature. The hinge knuckles may be visible from one side, while the latch faceplate can usually be seen only at the door edge. The strike plate—or keep—sits on the frame and becomes conspicuous when the door is open.
For most domestic interiors, coordinate these visible parts:
- lever, knob, rose or handle backplate;
- hinge knuckles and leaves where they can be seen;
- latch or lock faceplate on the door edge;
- strike plate on the frame;
- visible screws, bolt-through fixings and privacy-turn components;
- escutcheons, keyhole covers and bathroom releases.
The internal latch case, spindle and parts concealed inside the door do not need to match. The latch bolt itself may also be supplied in a different metal from the faceplate. Concentrate on the surfaces visible during normal use rather than insisting that every hidden component has an identical finish.
Useful distinction: the faceplate is fixed to the edge of the door and surrounds the latch bolt. The strike plate or keep is fixed to the frame and receives the bolt. For a properly coordinated result, check both—not just the latch faceplate.

Why the same finish name may not produce an exact match
Finish descriptions are useful, but they are not universal colour standards. One manufacturer’s satin brass may be warmer, paler or more heavily brushed than another’s. Antique finishes vary even more because the depth and pattern of ageing are part of their character.
| Finish | What to compare | Common coordination issue |
|---|---|---|
| Polished chrome | Brightness, reflectivity and the colour of the underlying metal | Adjacent components can differ slightly in mirror quality or appear cooler or warmer. |
| Satin chrome | Direction and coarseness of the brushed texture | A heavily brushed faceplate may look darker than a finely satin-finished handle. |
| Polished nickel | Warmth and depth of reflection | It can be mistaken for polished chrome, but nickel generally has a warmer tone. |
| Satin nickel | Warm undertone and surface grain | Mixing it with satin chrome often becomes obvious under warm indoor lighting. |
| Polished or satin brass | Yellow, gold or bronze undertone; lacquered, plated or living finish | Unlacquered solid brass changes naturally, while plated or lacquered items may retain their original appearance. |
| Antique brass or bronze | Base colour, distressed highlights and variation | Exact matching is difficult across different ranges because ageing effects are intentionally variable. |
| Matt black | Gloss level, texture and edge colour | “Black” can range from a smooth charcoal coating to a deep, textured powder-coated finish. |
| Stainless steel | Grade, brushing direction and sheen | A stainless-effect plated product may not look identical beside solid stainless steel. |
The most reliable approach is to buy visible components from the same manufacturer and coordinated range where possible. If you need to mix ranges, compare physical samples in the room where they will be installed. Daylight, warm LEDs and cool LEDs can make metal finishes appear noticeably different.
Browse the main collection of door handles first, then use the selected handle finish and design language as the reference for the rest of the door set.
Match the design as well as the colour
A coordinated result is about shape and proportion too. A contemporary square lever on a slim square rose generally sits more comfortably with clean-edged hinges and a simple rectangular faceplate. A traditional lever on an ornate backplate may suit finial hinges, rounded details and warmer aged finishes.
Repeat the geometry
Pair square roses and sharply defined levers with similarly crisp faceplates. Use rounded roses, softer lever shapes and radius-ended components where the scheme is more traditional or relaxed.
Keep the visual weight balanced
Large handles on substantial doors need hinges that look and perform appropriately. Very light-looking hinges can make an otherwise well-specified door set appear under-engineered.
Be consistent across sightlines
Doors visible from the same hall or landing usually look best with one handle family and finish, even where the latch or lock function differs from room to room.
Make sure the handle and latch are compatible
Finish coordination cannot compensate for the wrong latch. Before ordering, establish whether the door requires a tubular latch, bathroom lock, sashlock, deadlock or another mechanism.
Lever handles on roses
A lever on rose normally operates a tubular latch. Many modern lever handles use a standard 8mm square spindle, but this should still be checked against the latch follower. If the rose uses bolt-through fixings, the latch case must have suitable fixing holes or enough clearance for the bolts to pass without hitting the case.
Lever handles on backplates
A plain latch backplate normally works with a latch. A backplate with a keyhole requires a compatible sashlock, while a bathroom backplate needs a bathroom lock and turn mechanism. Check the distance between the spindle centre and keyhole or turn centre: these centres must correspond with the lock case.
Door knobs
Knobs generally need a deeper latch than lever handles so that fingers do not strike the door frame when the knob is turned. A 76mm latch case is a common starting point, but the right size depends on the knob diameter, rose and frame detail. Always use the stated backset rather than relying on the nominal case length.
Case depth and backset are not the same measurement. Case depth is the overall depth of the latch body. Backset is the distance from the front edge of the faceplate to the centre of the spindle follower. The backset determines where the handle sits on the face of the door.
Our guide to Choosing latches to go with your door handles explains these options in more detail.
Check faceplate dimensions before replacing an existing latch
On a new door, the joiner can cut the mortice to suit the selected latch. On an existing door, matching the current faceplate dimensions can save considerable remedial work.
Remove the handles and latch only when it is safe to do so, then record:
- faceplate height and width;
- whether the ends are square or radiused;
- screw-hole positions, measured centre to centre;
- latch case depth and body height;
- backset to the spindle centre;
- door thickness;
- the size and position of the strike plate on the frame;
- the spindle size and required spindle length.
A faceplate that is slightly smaller than the existing recess can leave exposed cut marks. A larger one may require careful chiselling and can bring its screws too close to old holes. If the new screw enters an enlarged or damaged hole, it may not hold securely.
Do not assume that the faceplate can simply be removed from one latch and transferred to another. Faceplates are commonly designed as part of a particular latch, and changing one can affect bolt movement, alignment or product certification.
Where handles are also being replaced, use How to Measure Replacement Door Handles before ordering. It is especially important for backplate handles, where existing fixing holes and keyhole centres may otherwise remain visible.
Choosing hinges that look right and carry the door safely
Hinges should never be selected by finish alone. Their first job is to support the door and allow it to move without dropping, binding or placing excessive stress on the frame.
Check the following:
- Door dimensions and weight: include the weight of glazing and fitted hardware, not just the bare door leaf.
- Door construction: hollow-core, solid-core, engineered timber and fire doors impose different demands.
- Hinge size and thickness: the leaves must suit the door and frame, while the knuckle must provide adequate clearance.
- Number and position: many internal doors use three hinges, but the correct arrangement depends on the door, hinge rating and manufacturer’s instructions.
- Bearing type and duty: frequently used or heavier doors may require bearing hinges rather than light-duty plain-bearing hinges.
- Opening environment: bathrooms, exterior locations and coastal areas require particular attention to material and corrosion resistance.
When coordinating the finish, view the hinge with the door in both its open and closed positions. The knuckle is usually the most visible part when the door is closed, but the full leaves and screws become visible when it opens.
A note about fire doors
Fire doors are tested assemblies, not ordinary doors with upgraded hinges. Use hinges, latches, locks and associated intumescent protection that are documented as suitable for the particular fire-door application. Follow the door-set manufacturer’s instructions and relevant certification; do not make additional cut-outs or substitute components solely to obtain a closer colour match.
The required hinge grade, quantity, fixing method and use of intumescent hinge pads depend on the door assembly. If the door has a certification label, plug or installation schedule, preserve it and check the specification before altering the hardware.
Coordinate hardware room by room without making every door identical
A consistent finish can run throughout the property even though the mechanisms change. For example:
- living rooms and bedrooms may use matching lever handles with tubular latches;
- bathrooms can use the same lever design with a bathroom lock, turn and emergency release;
- a home office may use a matching lock backplate or separate escutcheon;
- cupboards can use complementary knobs or non-locking handles;
- heavier or fire-rated doors can use higher-performance hinges in the closest coordinated finish.
The visual family remains consistent while the concealed hardware changes to suit each door. This is generally better than specifying an unsuitable latch or hinge merely because it is part of an exact matching set.
Use a door schedule for multi-door projects
For a renovation, extension or commercial project, create a simple door schedule before ordering. Give each door a reference—such as D01, D02 and D03—and record its location, handing, thickness, approximate weight, fire rating, handle function, latch or lock, hinge requirement and finish.
This avoids common ordering errors, including supplying a bathroom with a plain latch, forgetting matching strike plates or buying too few hinges. It also helps keep hardware consistent when orders are placed in stages.
| Door reference | Record these details | Why it matters |
|---|---|---|
| Door | Location, material, thickness, width, height, weight and fire status | Determines hinge and hardware suitability. |
| Handle | Style, rose or backplate, spindle, fixing method and finish | Establishes the main visual reference and fitting requirements. |
| Latch or lock | Function, case depth, backset, centres, faceplate size and finish | Ensures correct operation and alignment. |
| Hinges | Type, size, grade, quantity, material and finish | Confirms that the door is adequately supported. |
| Accessories | Strike plate, escutcheon, turn, release, door stop and fixings | Prevents small but visible components from being overlooked. |
Replacing hardware without creating extra repair work
If you are retaining existing doors, measure before choosing a style. Backplate width and length, fixing centres and spindle-to-keyhole measurements are especially important. A smaller replacement may expose old screw holes, paint lines or compressed areas in the timber.
Check hinge dimensions in place rather than measuring only the visible knuckle. Record the open leaf height, total width, leaf thickness, screw pattern and corner shape. A replacement that is thicker or thinner than the original can alter the gap around the door and cause it to bind or sit too far from the frame stop.
For a structured overview, see Planning and Replacing Door Furniture. If the components are being fitted as a coordinated pack, follow How to fit internal door handles using a door handle pack.
Do not use timber screws to pull a misaligned handle into position. The spindle and latch follower should align freely before the screws are tightened. Forcing the assembly can make the lever bind, prevent it from returning properly or shorten the spring mechanism’s life.
What to do when an exact finish match is unavailable
An exact match is not always possible, particularly when retaining older hinges or replacing discontinued hardware. In that situation, make the difference look intentional:
- Match the most visible items first. Prioritise the handle, rose or backplate and nearby accessories.
- Keep paired parts together. The latch faceplate and strike plate should usually share a finish, even if the hinge is slightly different.
- Choose a controlled contrast. A black handle with black hinges and a stainless latch bolt can look deliberate; two almost—but not quite—matching brass tones often look accidental.
- Repeat the decision. If several doors share the same sightline, apply the same combination to each one.
- Compare at normal viewing distance. Minor variation visible when components are held side by side may disappear once they are fitted on different planes.
It can also be appropriate to coordinate with other room details, such as cabinet handles, taps or light fittings. They do not need to be identical, but the undertones and level of sheen should feel compatible.
Special cases: external, bathroom and uPVC doors
External doors
Confirm that every exposed component is suitable for exterior use. A finish intended for a dry internal room may deteriorate rapidly when exposed to rain, salt-laden air or frequent condensation. Material and corrosion resistance take priority over an exact cosmetic match.
Bathrooms and utility rooms
Ventilation and cleaning routines affect finish life. Avoid leaving condensation on hardware and do not use aggressive limescale removers, bleach or abrasive cleaners on decorative finishes. Make sure the bathroom turn, emergency release and lock all share compatible centres and spindle sizes.
uPVC and multipoint-lock doors
These handles are selected according to the existing multipoint lock dimensions rather than a tubular latch. Important measurements include the fixing centres, spindle-to-cylinder dimension, backplate size and spindle arrangement. Use How to Measure uPVC Door Handles (Step-by-Step Guide) before ordering replacements.
Care that keeps coordinated finishes looking consistent
Different components may be made from different base materials, even when their finishes match at installation. Their appearance can therefore change at different rates. Sensible maintenance reduces the contrast:
- remove dust with a soft, dry cloth;
- if necessary, use a lightly dampened cloth and dry the surface immediately;
- avoid metal polish unless the manufacturer specifically recommends it for that finish;
- do not use wire wool, abrasive pads, solvents, bleach or acidic cleaners;
- keep wet paint, plaster and adhesive away from finished metalwork;
- do not lubricate decorative surfaces—apply the correct lubricant only to the mechanism and in accordance with its instructions;
- tighten loose fixings carefully before movement damages the rose, backplate or door face.
Unlacquered brass and some bronze finishes are intended to develop a patina. That change is not necessarily a defect. If a uniform, low-maintenance appearance is important, choose a stable plated, coated or lacquered finish and follow its care instructions.
A final specification check before ordering
- The handle function suits the room and door.
- The spindle size and length suit the handle, latch and door thickness.
- The latch backset positions the lever or knob comfortably.
- Bolt-through handle fixings will clear or pass through the latch case correctly.
- Lock centres match the handle backplate, keyhole or bathroom turn.
- The faceplate shape and dimensions suit the new or existing recess.
- The strike plate is included and supplied in the required finish.
- The hinges are rated for the door’s dimensions, weight, use and environment.
- Fire-door components and intumescent protection follow the door-set specification.
- Visible screws and accessories coordinate with the principal finish.
- Finish samples have been compared under the room’s actual lighting where close matching matters.
- Enough components have been ordered for every door, with door handing checked where products are handed.
A century of supplying door furniture has shown that the best-looking installations are usually the best planned. Establish the technical specification first, use the handle as the visual reference, and treat hinges, faceplates, strike plates and fixings as one complete door set rather than separate purchases.
